WebConnect for Customers
WebConnect for Customers allows customers to login to enter, view, and update issue tickets and see the status of other service activities.
The first step is for the customer to login by selecting login .
.
Typically after loging in you will go directly to the New Issue screen. However, your service provider may have it setup to first select a job site or go to a different start screen.
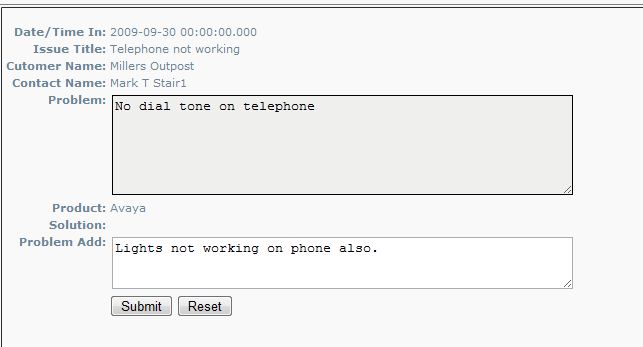
Selecting New Issue or going to this screen after login, the customer should enter an Issue Title, select a priority, enter a product and the problem description. Once all known information is entered, select submit. Once the issue ticket is submitted, the customer will receive a confimation email and emails will go to the service company depending on the priority and email settings. An email will also go to the customer or site's primary and secondary technicians in SME.
The issue goes into SME under Help>Issues or by selecting Control-i to see all open issues.

Other customer functions in WebConnect:
- Job Site: Allows customer to select a job site. This is good for a parent or billing customer with multiple job site locations. A single contact setup on the billing or parent customer can enter issues and see status for all the job sites.
- View Issues: Allows customer to see all issues their company has entered. They can select View to see the issue details and add additional details to the issue.

- Update Issue: the customer can update issue details by adding more information in the view issues screen
- View Service: Allows customer to see all service orders.
- View Intall: Allows customer to see all install orders
- View Invoice: Allows cusotmer to see all invoices
- Help Desk Info: Shows all articles or records from SME Help Desk
- Show Equipment: Allows customer to see all the equipment entered in SME for that customer or job site.
- Show Info: Shows the account balance and aging information so the customer can see money owed.
- Create Account: Allows customer to create additional logins for other contacts for that customer or job site. Once one customer is setup in SME for access, that customer will be able to create additional accounts that will go into the SME customer contacts.


Preferences
- Edit Account: Technican can update their contact information
- Change Password: Technician can change their password by entering their current password and then new password twice.
- Forgot Password: Select if you forgot your password. This will send an email to the service company to reset your password.
- Logout: Log out when you have completed your tasks or entered any issues.