Difference between revisions of "Views"
m (Fixed video player) |
|||
| Line 2: | Line 2: | ||
<br>Customizing Search View Basics<br> | <br>Customizing Search View Basics<br> | ||
| − | + | {{#ev:youtube| O5gbnenlsaw }} | |
<br> | <br> | ||
Revision as of 22:36, 11 January 2021
SME users can now create multiple search grid views for each module. Search Views can be shared among users or made as private. This views feature will tremendously improve productivity by allowing faster access and more refined search of information. We have also added a View menu item so you can directly get to various views without first going to the module.
Customizing Search View Basics
Steps:
- Create Views
- Use Views
- Modify Views
- Advanced Features
- Create Views:
Creating views is similar to the way you customized search grids in previous SMP and SME versions. For this example, we will create a new customer view showing Customer name and Balance information.
1. Go to the module were you want the new view. In our example, select Customers in the Customers section.
2. Select Search All Customers

3. The default grid will show. Let’s customize the grid and view.
4. Select Views>New View.

4. Select the fields you want to view. For this example, we select Name and Balance. TIP: type in the characters to find the fields, in this case type in ba and it goes to the Balance field.

5. Now select the customer you want to go to. Since your view has changed, it will ask to Save the new view. Select Yes.

6. Give it a Name. If you use the same name as an existing view, it will ask to replace that view. In this example, we select “Customer Balance” and select ok.

7. You have now created your new view!
2. Using Views
You can use the views from the “Search Views” menu item no matter which module you are in. Or you can use the Search button from within a module to select your views.
- Search Views Menu item:
- Select Search Views, then select the module, then select the view.
- In this example, select Search Views>Customer>Customer Balance
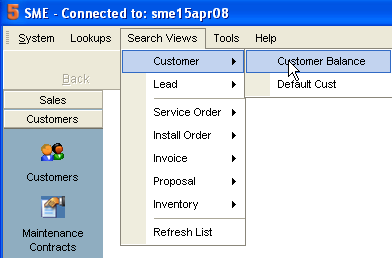
- Note that it doesn’t matter which module you are in, you can go to the customer search view at anytime.

2. Module Search
1. SME still has the searches you are used to within the module, but now we have an additional option to use your views.

3. Modify Views
You can modify views that you have previously created including applying views, creating vies, deleting views, changing views,

- Apply View: To change to another available view for this module
- New View: To create a new view. This will open the field selector grid.
- Delete: To delete a view. NOTE: You can note delete the view you are currently using.
- Save View: To save your current view, for example if you made changes or want another copy.
- Options:
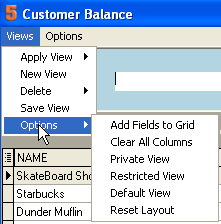
- Add Field to Grid: To select the fields you want to show from this view
- Private View: To make this view private to your login account only.
- Restricted View: Restrict this view to admin only users.
- Default View: Makes this as the default view. So whenever customers search is called, will use this view as the default.
- Reset layout: This reverts the view to the original view settings. So if you made changes to the view, but don’t want to save this view you can reset back.

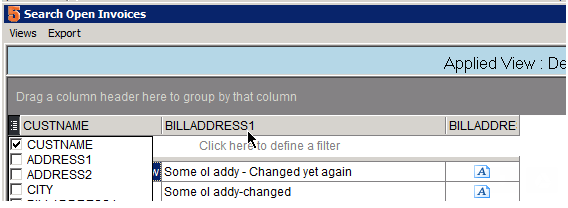
Show and hide columns with the left column selector.
- Add the column and click on the icon in the left corner of the field row as new fields are sometimes not checked for display. Note that they will export to Excel regardless of showing in the view. If you are attempting to add one of the address blocks, Bill or address they will not show as they are actually embedded in a field and do not display directly in the view.

4. Advanced Features
Now that you understand views, let’s go into some advanced features within the search grid. These features actually existed in previous versions of SME and SMP, but with views, it makes these much more useful and reusable.
For our example, we will use the Customer Balance view, but now we will now only show customers with a balance above a certain level.
- Filtering: From within a search view, you can do elaborate filtering of the view.
- Select the Green funnel icon in the lower left
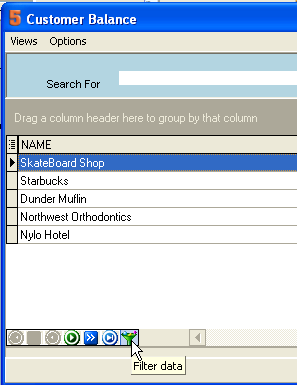
- First select the bar that says “press the button to add a new condition”
- Then select the field from your view that you want to filter
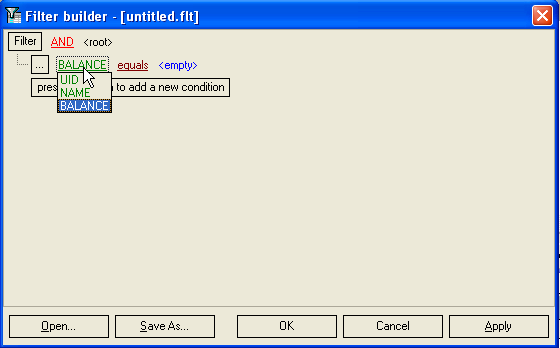
- Select Balance for our example
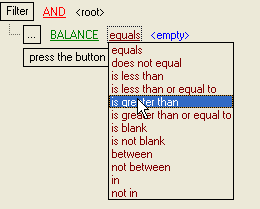
- Select the condition. For our example, we select greater than
- Finally select the condition value. For our example, select 1000
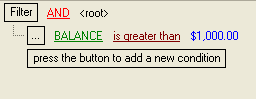
- Select Ok to save the filter settings
- Now you have your new filtered view
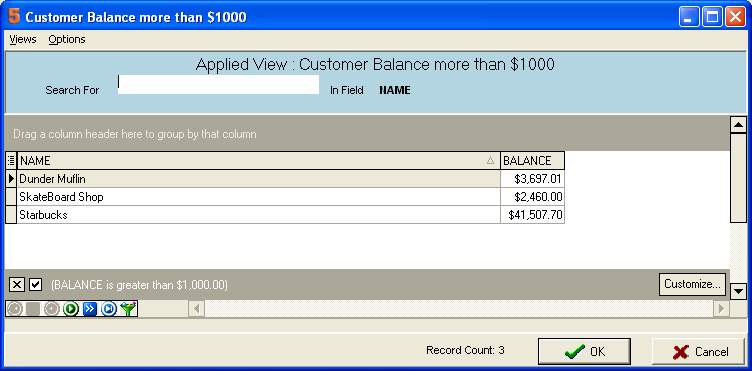
- Notice the condition in the lower left corner. If you want to remove the filter condition select the X. If you want to change the condition select customize in the lower right corner.
- Select the customer and select Ok
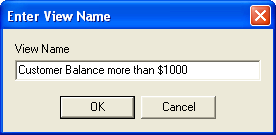
- It will ask to save the new view. This time we create a new view called “Customer Balance more than $1000”