SMP Install (Old)
Installations and Upgrades
Different types of installations may be performed in different ways depending upon your needs. You can perform a first-time installation (commonly referred to as an “installation”) or you may replace your current version of SME with a newer version (commonly referred to as an “upgrade”). Both network and stand-alone installations or upgrades may be performed.
“Stand-alone” refers to running SME on a single computer, rather than using it on multiple workstations that access SME through a network.
Installations may be performed with your SME CD’s Setup Wizard.
Upgrades may be performed with the Setup Wizard, or by using the Live
Update utility in SME.
We recommend taking a few minutes to review the sections About This Manual, The Basics
and Overview of SME, prior to setting up SME.
Before You Begin
You must have Microsoft Windows™ installed on your computer prior to installing and using SME. See your Windows documentation for installation information.
You should also have a basic knowledge of Windows and of your computer. You don’t need to be an expert, but knowing the basics will help you get the most from your SME software.
Verify that your computer meets the System Requirements. In order for SME to operate
effectively on your computer system, it is important that your computer meet the minimum system requirements.
Perform this type of installation if you are installing SME for the first time on a network or single computer with an SME CD.
Network (Server & Workstations) Instructions
Stand-Alone (Single Computer) Instructions
Upgrade Using an SME CD (Standard Upgrades)
Perform this type of upgrade if you have an updated SME CD to replace your current version of the software on a network or single computer.
Network (Server & Workstations) Instructions Stand-Alone (Single Computer) Instructions
Upgrade Using the Live Update Utility
Live Update is an upgrade utility allowing you to update your current version of SME with the latest version available via the Internet.
Network & Stand-Alone Instructions
Upgrade from SME 2.9 to SME 5 for Windows
The Upgrade from SME version 2.9 allows you to import your SME 2.9 data to SME 5 for Windows.
Network & Stand-Alone Instructions
System Requirements
Your system must meet these minimum requirements in order to install and use SME:
- Microsoft Windows NT, 2000, XP
- A PC compatible computer with Intel Pentium III or higher, AMD Processor.
- 500 MB of available hard drive space.
- 256MB of RAM (Windows NT 4.0, Windows 2000 Professional, or Windows XP
Professional).
- Video card capable of displaying 1024x768 resolution or higher.
Where to Find Your System Details
Consult your System Administrator (or refer to the documentation that came with your computer) for details about your computer system’s capabilities.
Removing SME from Your Computer
SME includes an uninstall utility for the removal of SME from your computer system. For step-by-step instructions, see the Uninstall Utility section of this chapter.
Registration
This page explains how to register your software.
SME registration is currently handled through Live Update. Be sure to check for updates on a regular basis and at least every month. High 5 Software will more comprehensive registration procedures in the future. At that time you will need to register your software has instructed.
Installation
Please refer to the separate SME5Install document for installation instructions.
Upgrade Using Live Update
Live Update is an automated upgrade utility, which allows you to update your current version of SME with the latest version available, at any time via the Internet. For stepby-step instructions, please see the “Live Update” section of this chapter.
Upgrade from SME 2.93
To Upgrade from an earlier version SME see the SME5Convert document.
Shortcuts and Program Groups
During an installation, the Installer adds a program group to the Programs area of your Start Menu. Following a successful installation, you can run SME by selecting the SME item from the SME program group.
SME Shortcut
The Installer optionally adds a shortcut to your desktop and quick launch during installation.
Rename, Copy or Move Shortcuts & Program Items
Shortcuts and program items may be renamed, moved or copied to other locations on your computer. Consult your Windows documentation for more information about manipulating shortcuts and program groups.
Live Update
In this section, you will learn how to use Live Update to upgrade your version of SME, at any time via the Internet.
Live Update is a semi-automated upgrade utility, allowing you to update your current version of SME with the latest version available, at any time via the internet.
Note: You must run Live Update at least once per month to make sure you have the
latest version software.
Live Update obtains the latest program files and Setup Wizard. The Setup Wizard asks you for simple information about the environment in which you wish to use SME. Based on the settings you choose, the Setup Wizard decompresses and installs the program files for you. For more information, see “The Setup Wizard” section of this chapter.
You may only run Live Update if you are currently running SME version 5 or later and you are under a support contract with High 5 Software. (Identify the version of SME you are running by selecting About from the Help menu.)
Live Update can be used to perform upgrades on either your network or stand-alone computer.
Before You Begin
By taking the time to complete the following tasks, you will help ensure that your installation goes as smoothly as possible.
Close all programs running under Windows.
Only your qualified Network Administrator should perform a network upgrade.
Make sure no one else is using SME make sure everyone have completely exited the SME program.
Note: SME upgrades through Live Update often require reindexing the Database automatically.
SME will know if reindex is necessary and will automatically perform the reindex if necessary.
Upgrade Using Live Update
- Start SME.
- Make sure all users have exited SME. Select
Tools>Advanced>Check for Updates

3. Live Update checks your current version of SME and
looks for newer versions available through High 5 Software
4. Follow the instructions for the Live Update.
Uninstall
In this section, you will learn how to remove SME from your network or stand-alone computer using the Uninstaller.
The Uninstaller allows you to remove SME from your computer system. The uninstallation process removes only the SME program files, and leaves your data files intact, in the directory they exist at the time the program is removed. This section will guide you through the process of removing SME from your stand-alone computer, or your server and workstations.
SME does not delete your data files. We recommend that you retain a copy
of these files in your data directory for safekeeping, after you have
removed SME from your system.
Before You Begin
By taking the time to complete the following tasks, you will help ensure that your installation goes as smoothly as possible.
Close all programs running under Windows.
The choices you make during this process will tell the Uninstall Utility how to remove SME. If a custom installation or upgrade(s) has been performed, you will have to customize the uninstallation of SME. A custom uninstallation must match the settings used during the installation or upgrade.
Only your qualified Network Administrator should remove SME from your server and
workstations.
Note: Some workstation installations with not have any software installed on the workstation except for the shortcut.
Removing SME
You may follow the steps in this section to remove SME from your standalone computer, or your server and workstations.
Instructions
- Select the Uninstaller from the Start>Program files>SME5>Uninstall SME5

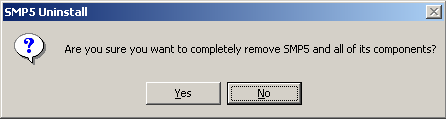

Custom Uninstallation If a custom installation or upgrade(s) has been performed, you will have to customize the uninstallation of SME. A custom uninstallation must match the settings used during the custom installation or upgrade.